


This article takes you step-by-step through the creation of your first funeral. We do recommend that you use the Funeral Wizard option to create the funeral even if you have not created many commonly-used places. The wizard has many benefits regardless of how complicated or simple your setup is.
1. In Funerals display click the Funeral Wizard button

2. A 'New Funeral' opens with 7 panels, starting with General - you will be able to move forward to the next panel once you have entered the minimum amount of data required. In General you must decide
Funeral Type, Branch/Company and Pre-Need (defaults to 'No')
Responsible staff defaults to the person signed-in but may be edited.
Funeral Origin information is optional depending on the settings you have made.
Click 'Next' to move to the next panel.
3. in Deceased Details you will enter the Deceased First and Last names.
Maiden Name can entered if appropriate.
Finally, Date of Death as well as the deceased address must be entered..
Click 'Next' to move to the next panel.
4. in Places you must enter the Completion Date, which is the expected date of Burial or Cremation. This will control the placement of the funeral in the Dashboard.
All other places are optional - 'Died at home' can be switched to 'Yes' and the place of death box will disappear. You can only fill these boxes with already-created places.
Click 'Next' to move to the next panel.
5. in Client you must enter the client details (or whoever is instructing you) this can be changed later)
Click 'Next' to move to the next panel.
6. In Next of Kin you have the option to click 'Not Yet Known' - again this can be changed later
Click 'Next' to move to the next panel.
7. In Notes you have the option to enter as much detail as needed regarding the next steps to be taken with the funeral. This field is optional, however, we recommend using it fully. Once the funeral is created any colleagues you have setup to receive notifications will be invited to read these notes when they login.
Click 'Next' to move to the next panel.
8. in Review you have the option to check all the data entered and the option to go back and amend any panels.
Click 'Create' once you are happy - Obit will assign a funeral reference based on either the default or the bespoke reference number pattern that you have created for your operation.
9. The Overview panel of the funeral you have started will be shown. In order to finish the funeral you will proceed (more or less) down the side-menu
10. In the General screen you can edit any of the boxes if you have full admin rights.
11. In the Deceased screen you may complete the picture of the deceased adding Title, Religion, Marital Status, Religion and Age.
You may also want to enter medical related info.
If you are using Obit to create a death notice/announcement you can fill in the notice section.
12. In the Grave screen you can enter grave details as desired.
13. In the Places screen you can enter all the places relevant to the way you have decided to use Obit. We recommend that you record
Place of death (no need for dates/times)
Place of Deceased pickup with dates/times optional
Place of Embalming/Preparation with dates/times optional
Place of Viewing/Repose with dates/times recommended
Please of Service with dates/times recommended
Place of Burial/Cremation with dates/times recommended
If you have not already created the Places, then when you select, for example the Place of Embalming, you will click the Create new place button

Hint - before you leave the places section of the funeral, double-check that the places are in logical date order; PIckup, Embalm, Viewing, Service, Burial/Cremation - this will help ensure that any documents printed look correct.
For more on this see https://help.obit.cloud/article/15-adding-places-to-a-funeral
14. In the Contacts screen you are free to edit the client information and to add as many other contacts as relevant
15. In the Belongings screen you are free to enter any belongings, such as jewellery that may be requested for return to the family.
16. In the Notices screen you can generate documents of all sorts from funeral information summaries for a celebrant to death notices for publication. You will need to already have document templates created that match your requirements.
If you wish to publish death notices on your website, please refer to this article - https://help.obit.cloud/article/48-publishing-death-notices-on-your-website
17. In the Orders screen you will create both the funeral account and the schedule/rota for the arrangements that you wish to control and circulate.
It's best if you have already prepared (in Items) the prices for all the elements that you are going to use. You can adjust prices in individual funerals.
Items are added to the funeral individually by clicking either the 'Open Add Items Side Menu' or the 'Import From' button to use funeral templates that you have prepared
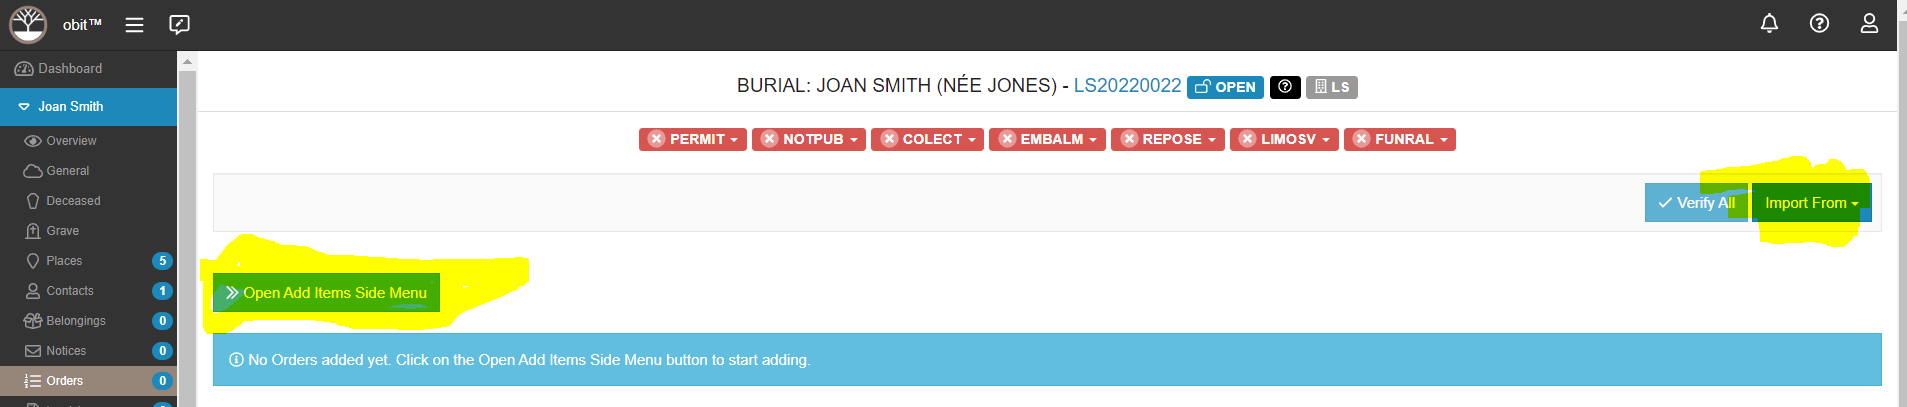
You can change prices and some text directly in the orders screen.
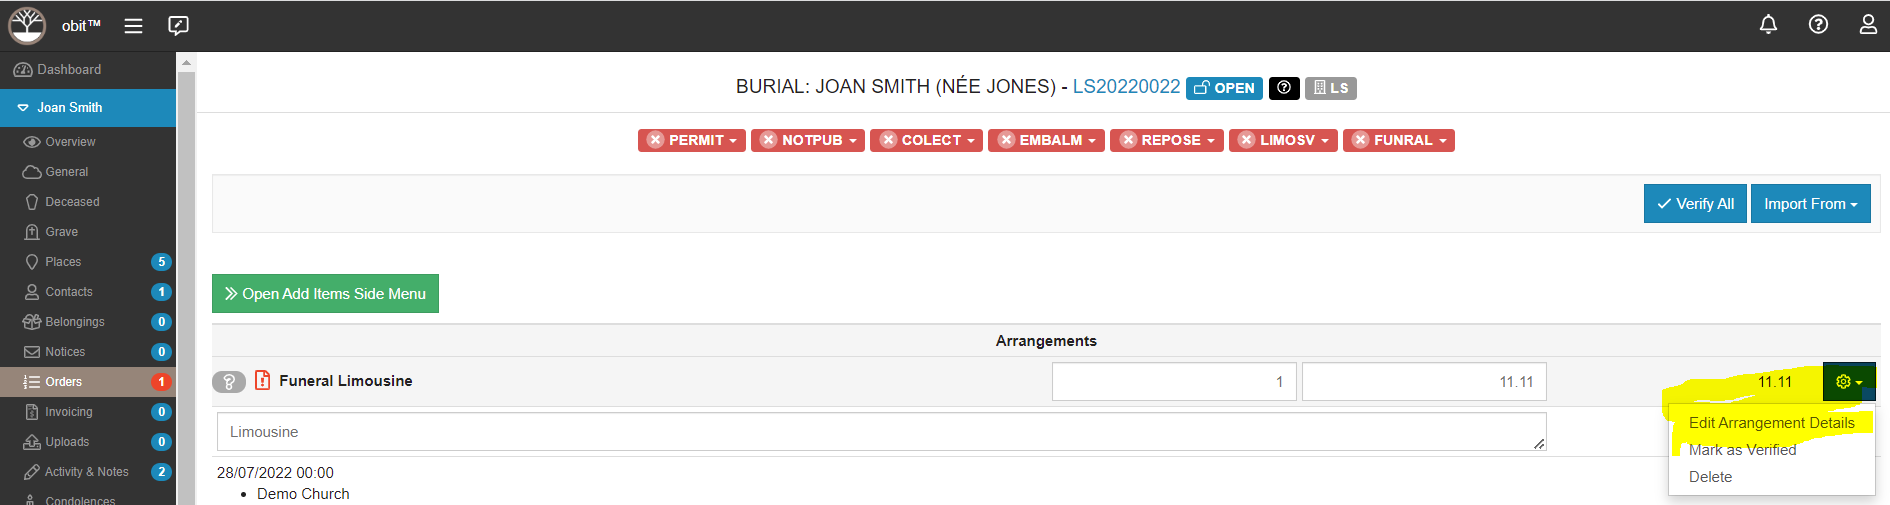
If you don't have templates prepared or if you have not fully completed the funeral places, you may need to adjust individual arrangements by clicking the gearwheel button and selecting the 'edit arrangement details option'
While you are adding items to the funeral account, the account total can be seen at the bottom.
Once you are happy with any items, you can verify them individually at the item level by clicking the gearwheel and clicking 'mark as verified' or globally by clicking the 'Verify All' button.
18. In the Invoicing section you can produce Quotations/Draft Invoices, Invoices, Receipts, Statements of Account and Account Follow-up letters.
You can process receipts to the funeral account as well as Refunds and Discounts. You can also close the funeral account here and decide how to treat any remaining balance.
Hint - we recommend that you stay in Quotation 'mode' until you are sure that everything is correctly reflected. Quotations can be easily cancelled and you can start afresh.
18. In the Uploads section you can add any relevant documents to the funeral
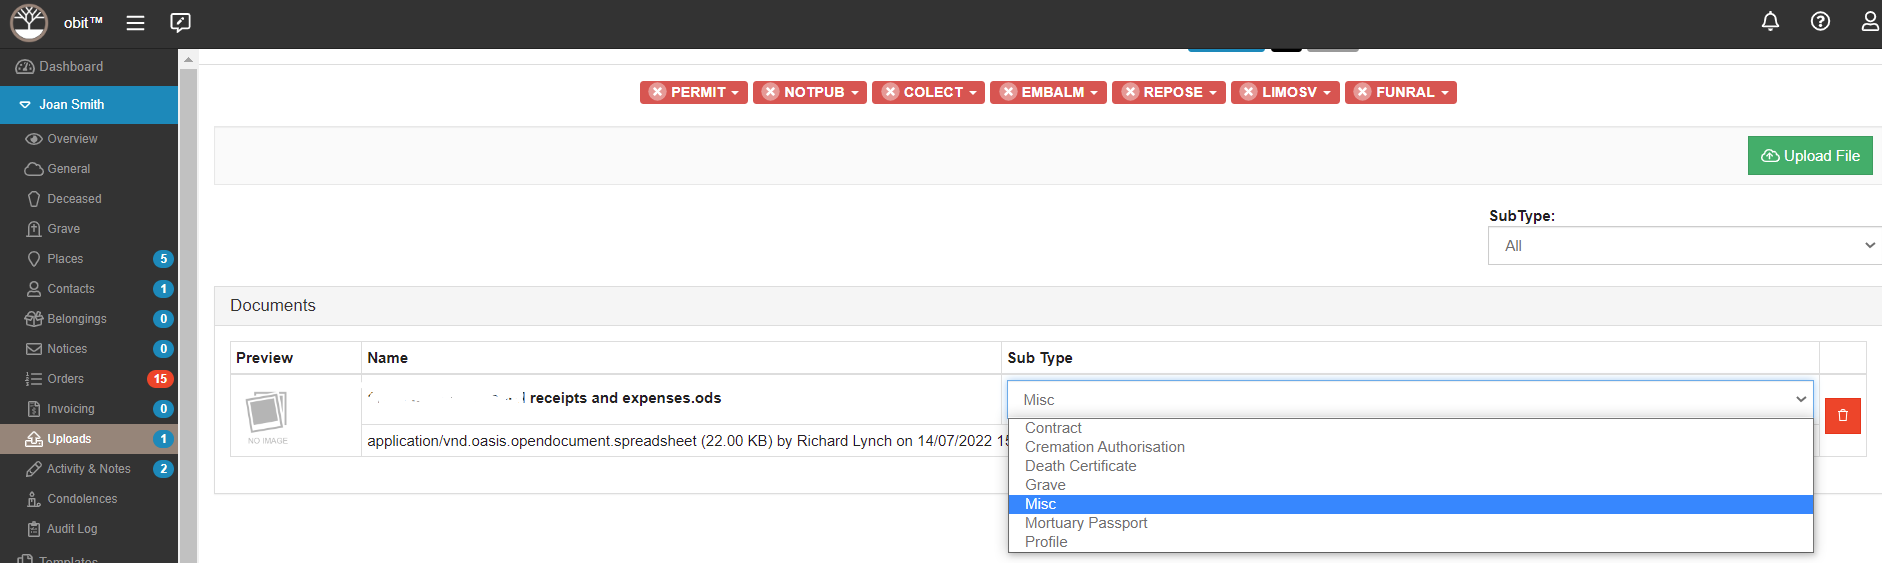
Any uploads will be defaulted to Sub Type Misc, you can change that as desired.
Hint - a photo of the deceased that you set to Sub Type Profile will display automatically in Overview and Deceased screens and can be automatically added to any death notice that you publish on your website.
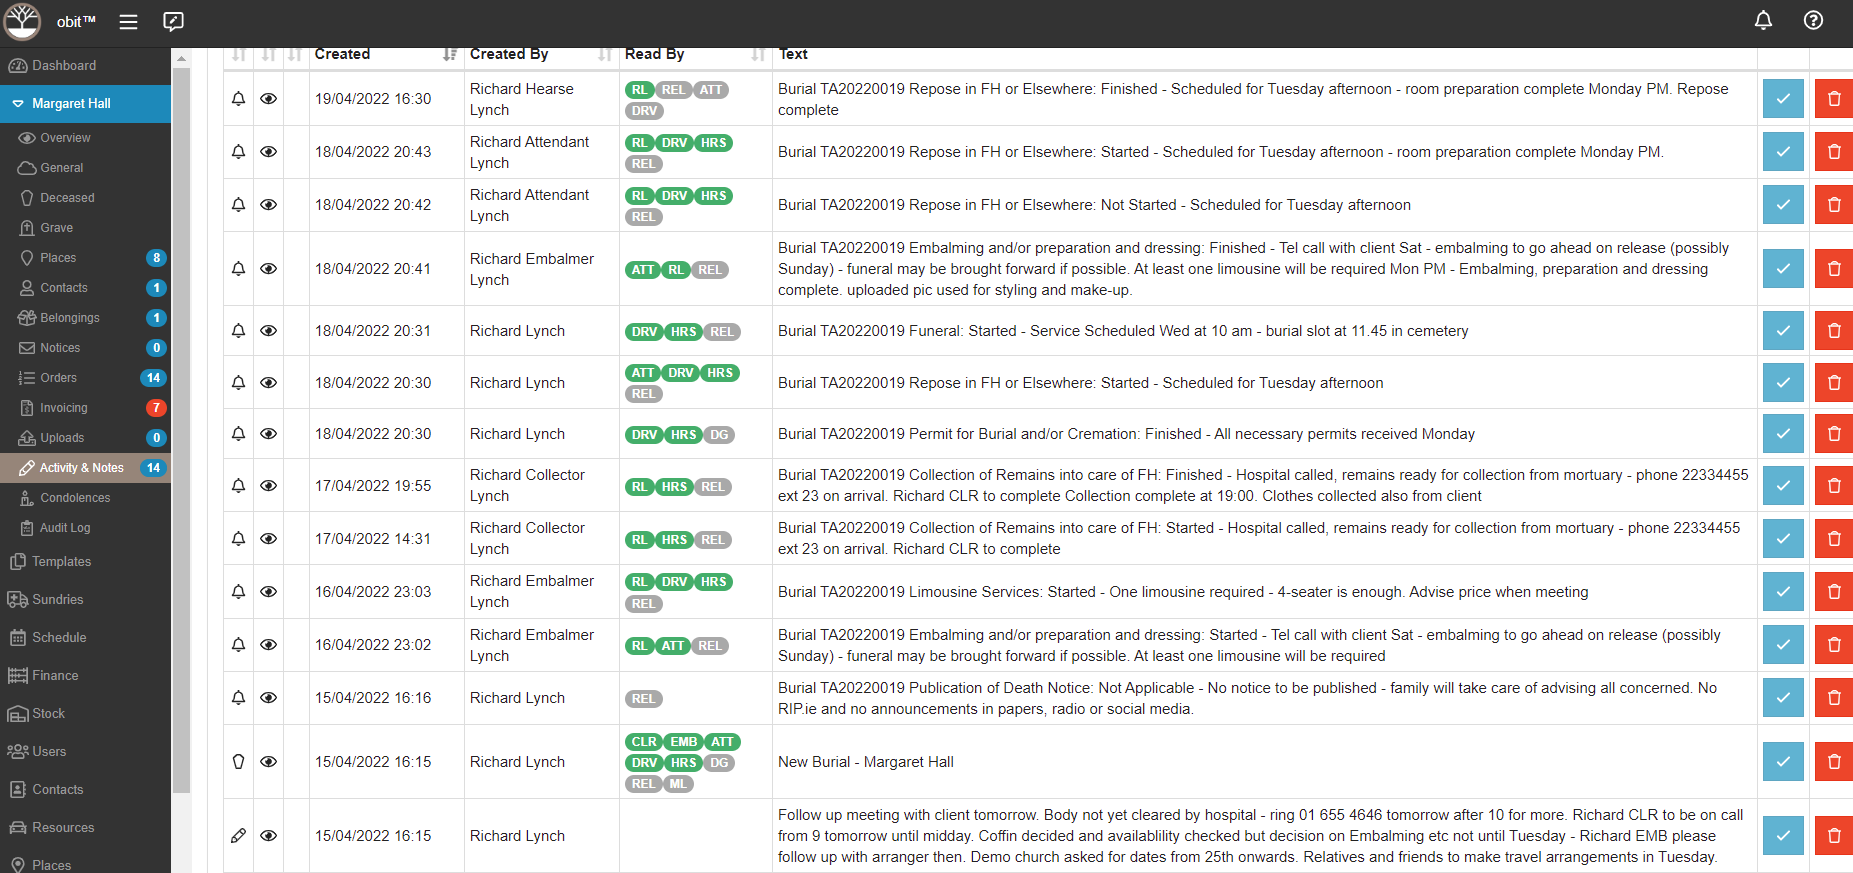
19. In the Activities and Notes section you will be able to see all Notes related to the funeral. You can see who created the note, at what time - who you have decided should see that note - those who have read it will be green, those who are yet to see the note remain grey. To get the most out of this you will need to set up your notification strategy in Company/Notification section. Below is an example of a completed funeral where various status notification events have been defined and actioned in a funeral.
20. In the Condolence section you will see all condolences that have been submitted via your website.
From here you can remove/edit as desired or appropriate.
You can also use the section to record phoned-in condolences.